IPL Acoustics M1TLm Ribbon Transmission Line speaker project – Part 5
The final stage of the build.
I wanted to make sure that the wiring of the crossovers and the driver polarity was right before final assembly so I tested the set up externally without an issues arising.
The wool for dampening the transmission line was measured with a pair of scales before being teased apart and nestled inside the cabinets, I followed the instructions carefully here as I didn’t want to rush into the last stages and produce uncertain results.
I thought adding the floor spikes would be a simple process but I was nervous about drilling holes in the base as I didn’t want to pierce the cabinet. When I used a hammer to tap them into place a small crack appeared in the MDF joints, this is’t a big deal and nothing a bit of filler and paint can’t sort out. Next time I’ll give this stage a little bit more thought, maybe add the spike fixings earlier on in the process.
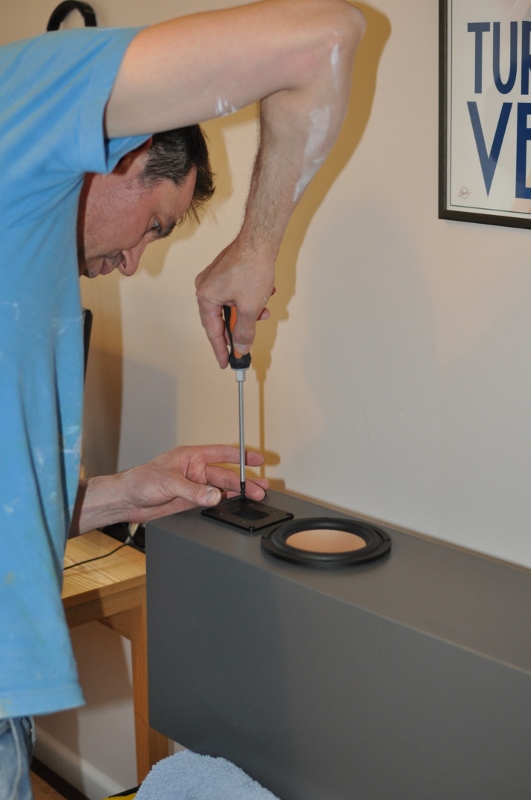
Finally the crossover panels were added and the internal wiring was soldered to the driver terminals before the drivers were screwed into place.
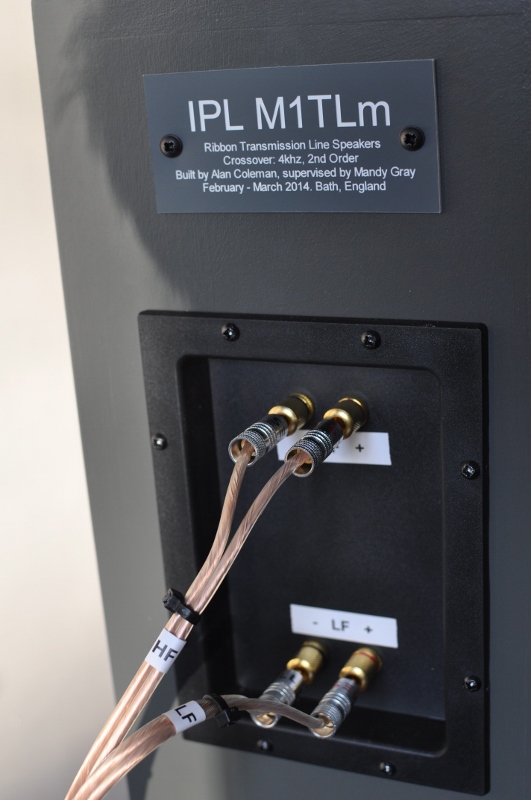
Even though my amp doesn’t support speaker bi wiring I made some new cables so that I could at least bi wire my new speakers. This future proofs the build, saves having to connect the low and high frequency terminals and looks way cooler. A Dynmo label writer came in handy throughout the latter stages of the build, especially when it came to labelling drivers and their polarity.
-

- IPL 5″ magnesium bass and Fountek Cd1.0 Ribbon

-
- Testing crossover and driver set up.

-
- Measuring wool dampening with scales.

-
- Screwing drivers into place.
-
- New bi-wireable speaker cables and boiler plate.
Speaker project build process
- IPL Acoustics M1TLm Ribbon Transmission Line speaker project – Part 6
- IPL Acoustics M1TLm Ribbon Transmission Line speaker project – Part 5
- IPL Acoustics M1TLm Ribbon Transmission Line speaker project – Part 4
- IPL Acoustics M1TLm Ribbon Transmission Line speaker project – Part 3
- IPL Acoustics M1TLm Ribbon Transmission Line speaker project – Part 2
- IPL Acoustics M1TLm Ribbon Transmission Line speaker project – Part 1